I wrote about buying some bare wah shells earlier here. I started assembling them for a project. Here are some notes for anyone else trying these.
If you’re going to paint or do any type of finishing work, you should do that before going through all of the assembly process. It would be difficult to disassemble and are to finish all of the surfaces after assembly.
For this project, I needed a couple of extra holes in the enclosure. I marked these and drilled them.


The wah enclosures did not come with instructions. I found this video to be pretty helpful. It walks through the entire process.
This video hits the major steps but doesn’t cover the details, which is where the devil lives! 👺
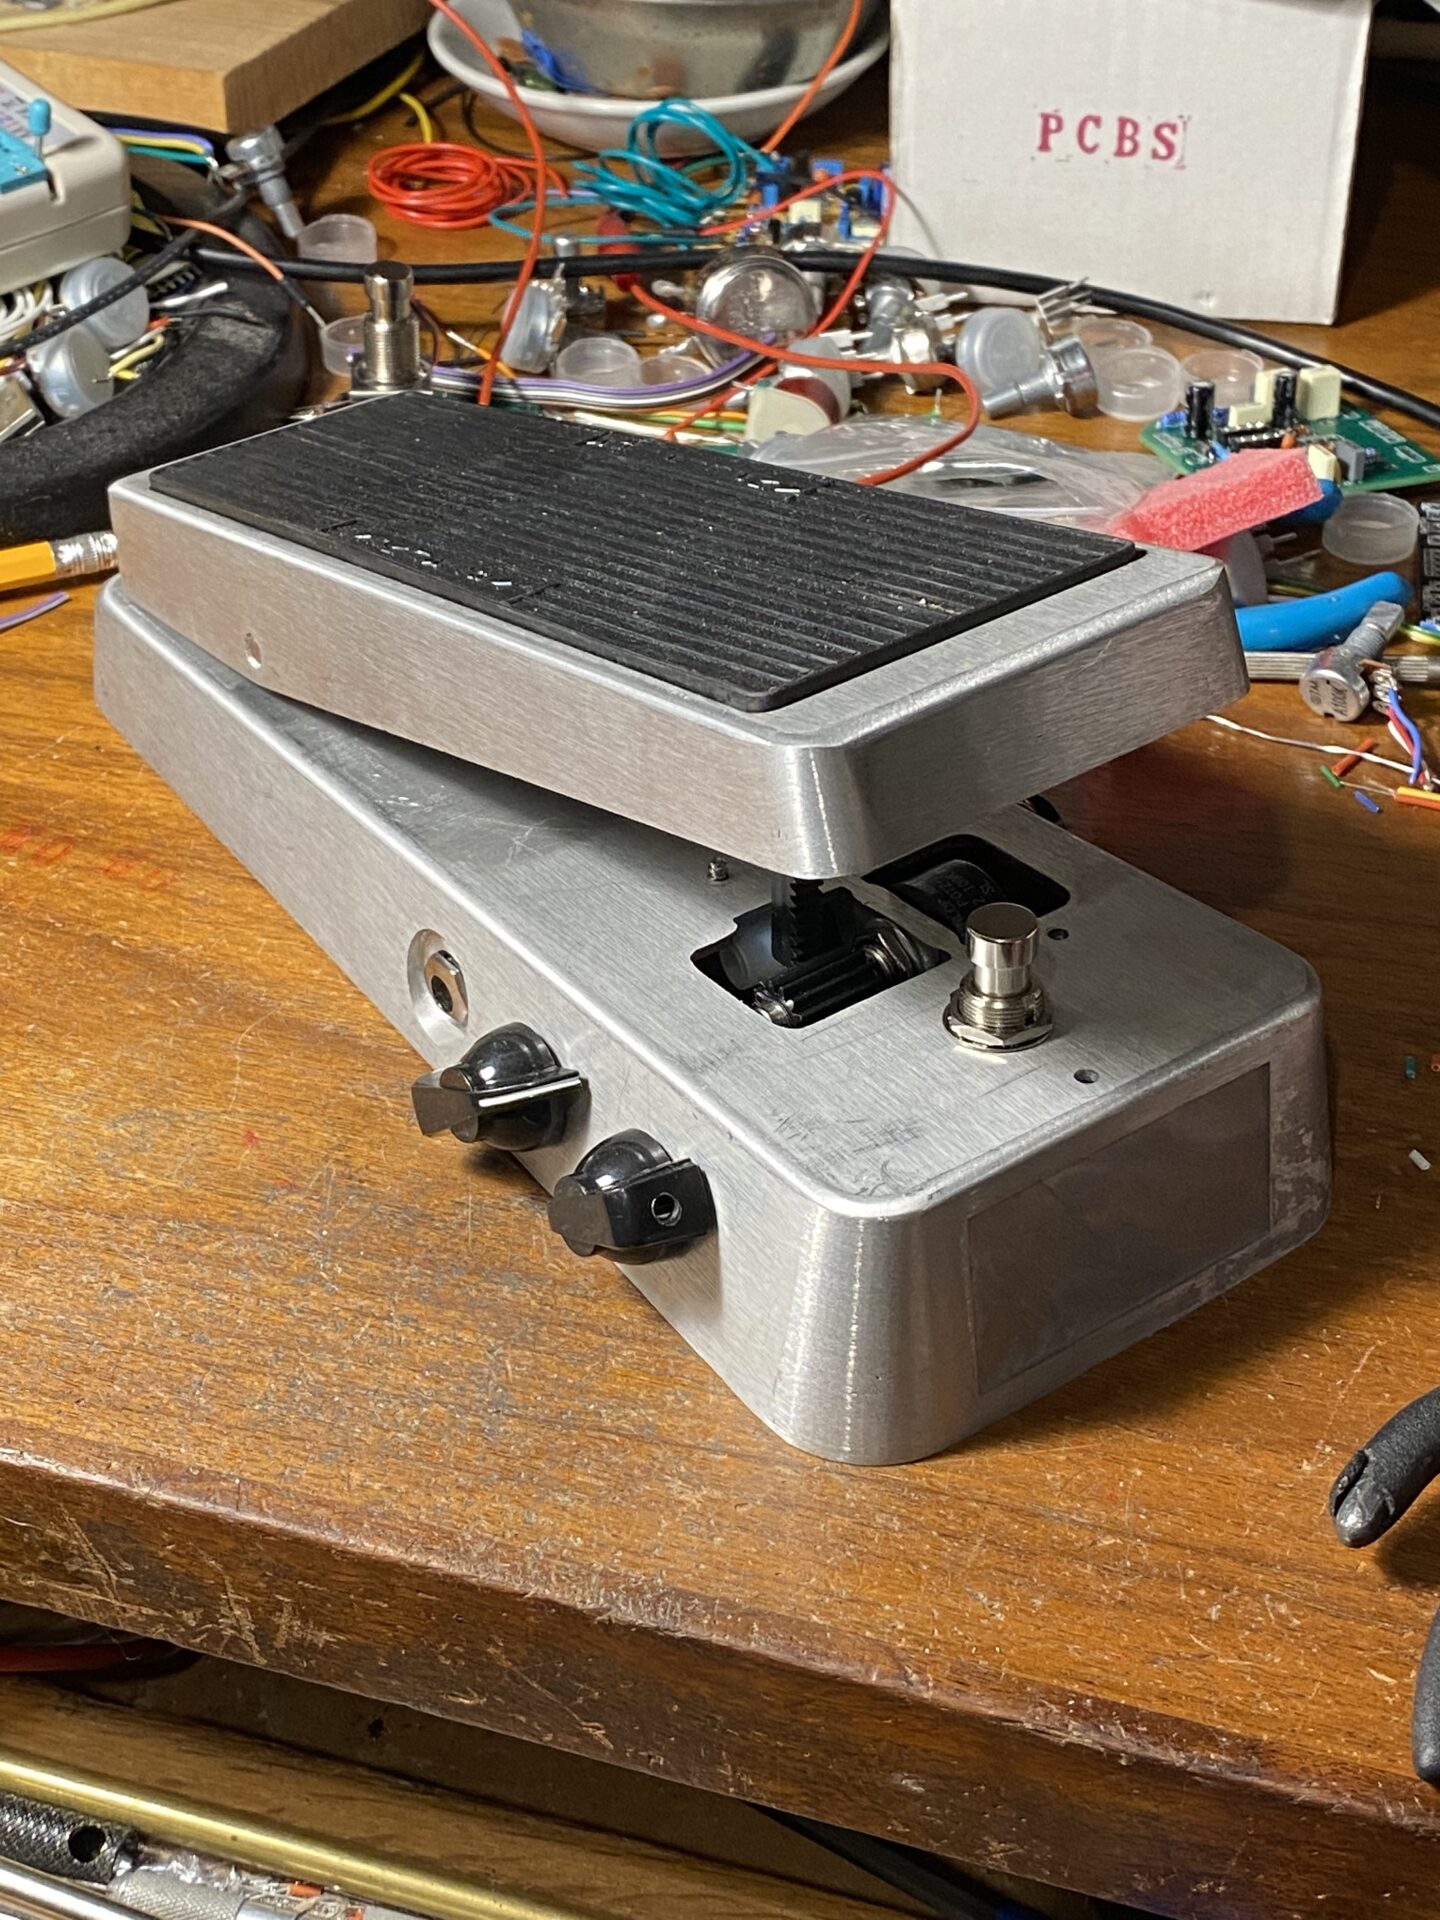
Following the video I assembled the rack gear on the foot pedal. I assembled it backwards the first time! The bracket has a notch where my thumb is in the picture. This should be on the opposite side, or the gear should be rotated 180 degrees. Otherwise it ends up too close to the pot and doesn’t not align with the tensioner. You’ll see this in a picture coming up.
Second, the two screws that hold the bracket to the foot pedal were too long. I managed to twist the top off of one of these when it bottomed out! I cut a couple threads off these screws with some wire cutters to make them work.


Next I added the bracket and tension block. Line it up with the pin. The video says the knurled side of the pin should be on the right. Knock the pin in with a hammer.
In my build the tension block had little affect on the pedal.


Next I test fit a pot. The wah “kit” comes with a gear but, doesn’t come with a pot. I had some of these “Hot Potz” that i was going to use.
Notice the rack gear is too far to the right in the first image. The bracket holding it to the pedal needs to be turned 180 degrees along with the gear. I mentioned this above.


With the rack and pot in place I tested the pedal to find the gear was not making good contact with the rack. There were two problems. First the tensioner was not pressing the rack against the gear. Second, the teeth on the Hot Potz gear are not the same pitch as the rack gear that came with the wah shell.
To fix the tensioner I wrapped two of those cable ties together, one over the other. This seems to be working but I can’t be sure yet, since there is another problem with the gear we will get to later.


I put my PCB into place. The board I used is a different size from the standard wah PCB. My PCB had a hole for mounting; I needed to drill a hole in the enclosure so I could add a bolt, nut, and nylon spacer.


These PCB-mounted jacks have a couple of flat washers and beveled washers. The two beveled washers go on the inside. The beveled washer would go on the outside; this is what I do when I use these jacks on a pedal. Here I had to leave the beveled washer off because it felt like the nut was too far outboard to allow the plug to be inserted all of the way in. I notice this is how Dunlop does it.


After assembling everything and testing the pedal, the action seemed a little rough. Turns out the gear on the Hot Potz pot has a courser “tooth” spacing then the rack gear. The teeth on the gears don’t quite align.


Leave a Reply