I just built a PCB project without the LED taken care of on the board, what a headache! In the old days everything was like that but we have evolved since then! in my most recent projects I have been following the layout used by PedalPCB. I feel like they have hit on an arrangement that works well.
Here’s my proposal: Let’s make this a standard! If everyone does it this we all know what to expect, it’s easier for everyone to wire board, and the build process is easy. It also makes for a clean build which leads to more successes and less debugging.


Here you can see the wiring is pretty neat and tidy. Notice the input and output jacks ground to the board on the left and right sides. The wire run is short and obvious. Also, see the four wires in the center of board run in a straight line to their connection at the stomp switch. This helps make the wiring self documenting.
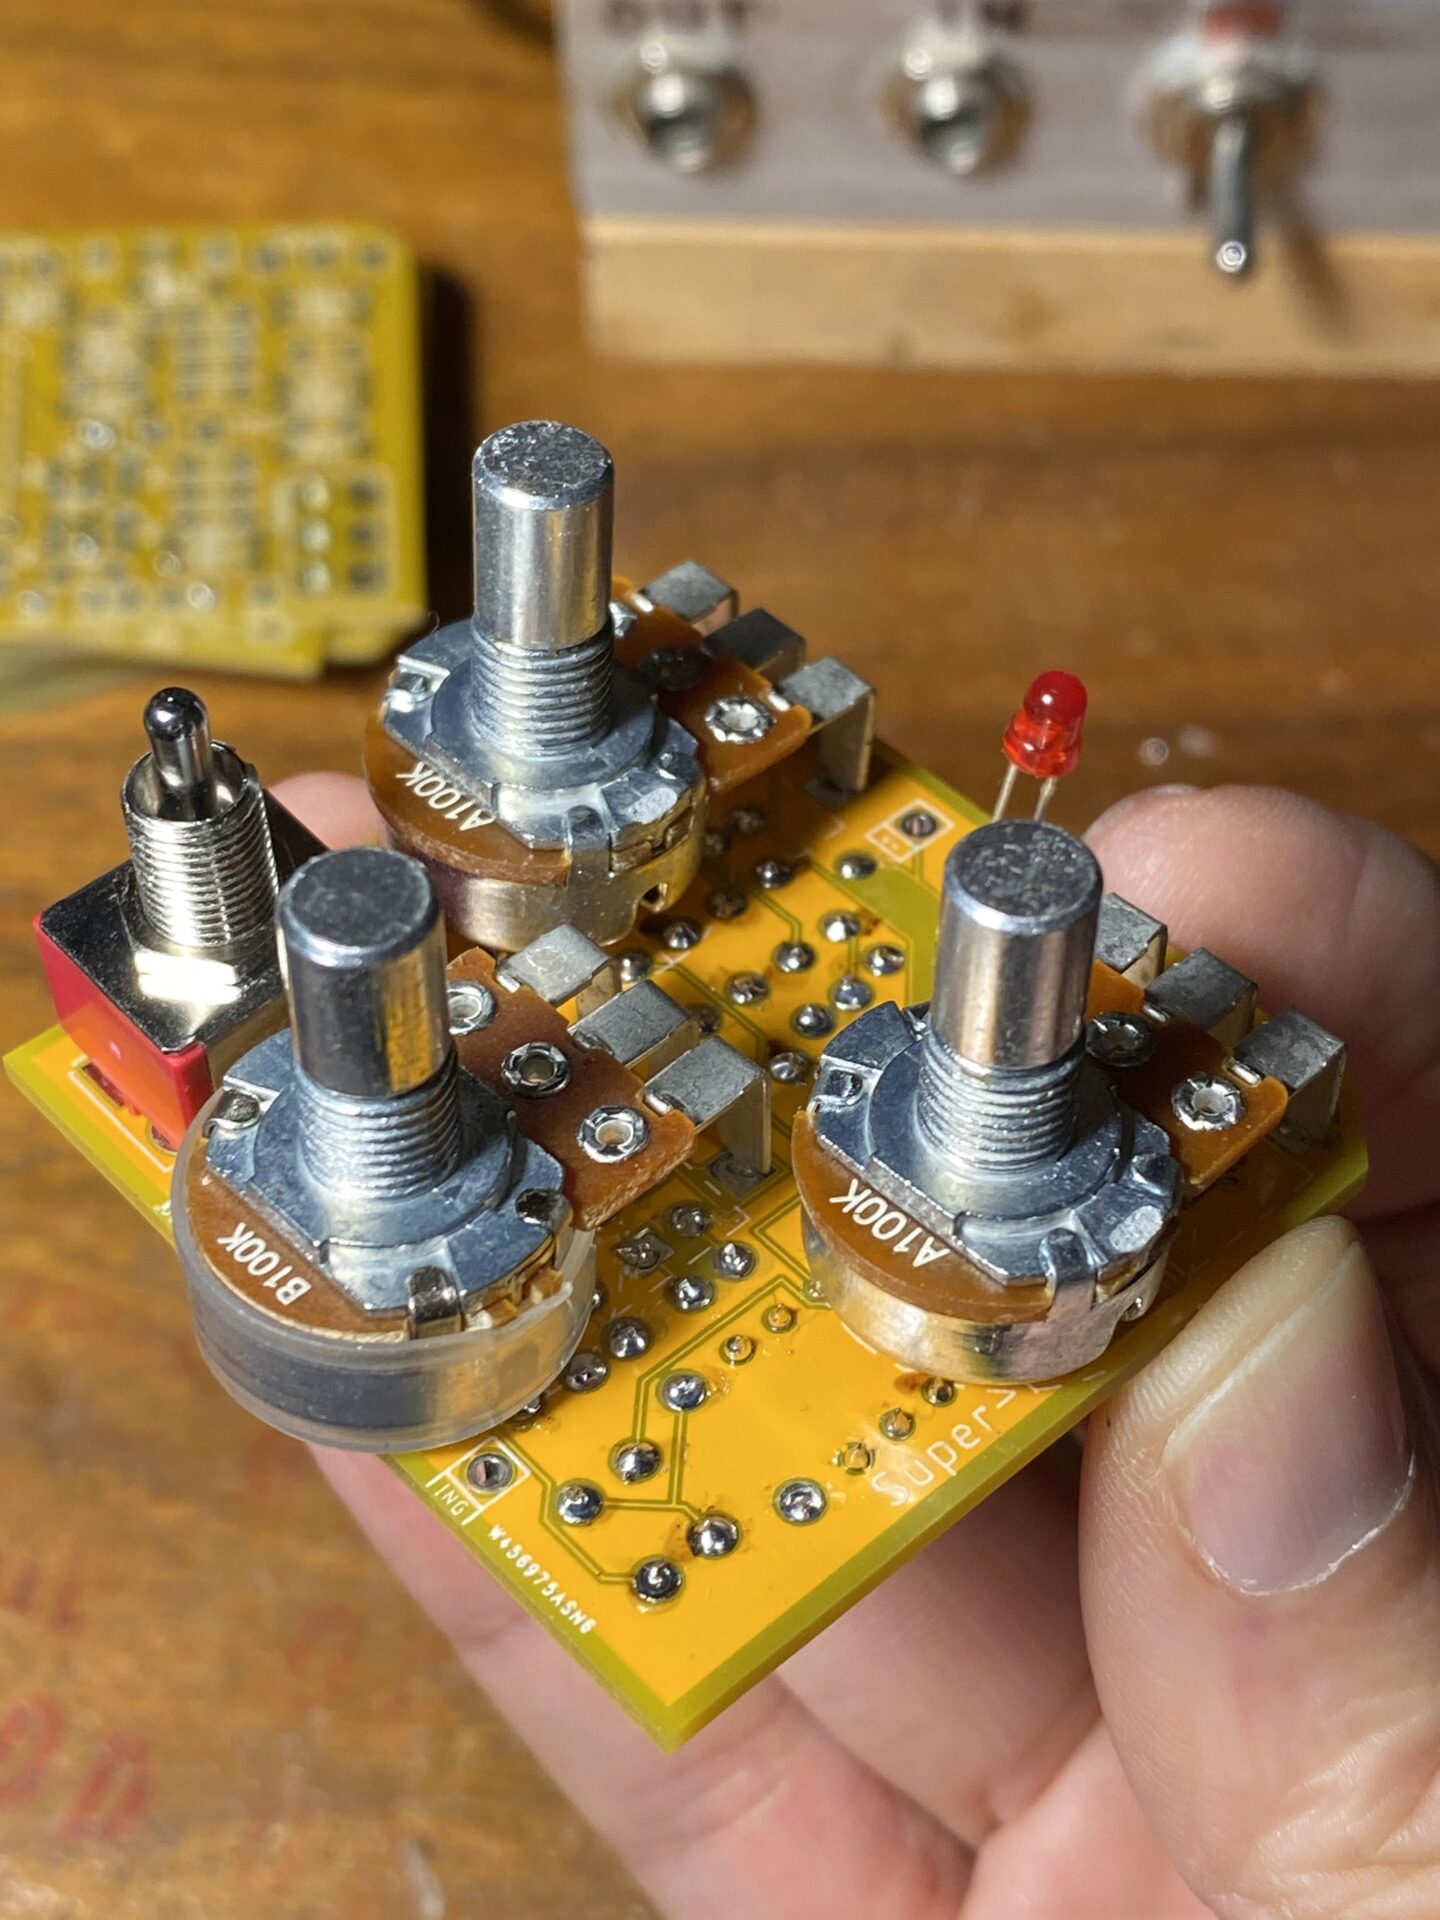
What way not be obvious from these images is that the pots and LED are also mounted to the board. This reduces the off board wiring and gives you a secure place to mount the and supports the LED.


Here you can see all of the pots, switches, and LED mounts to the board. This is clean neat and reliable. The board and LED have a secure mounting place.
What am I proposing here? A convention for laying out your PCB:
- Pots mounted to the board
- LED mounted to the board
- 4 connections at the bottom of the board:
- Effect In
- LED Switch
- LED Ground
- Effect Out
Why? It makes building guitar pedals really easy and less error prone.
- Mounting pots to the board saves on wiring, and makes a secure place to mount the PCB, and avoids mistakes.
- Mounting the LED on the board saves wiring avoids mistakes and gives you a place to securely mount the LED.
- Using the 4 connections at the bottom of the board avoids mistakes and makes wiring the switch, often a source of errors, easy and less prone to errors.
Here are a couple wiring diagrams for the project PCB above.


Check out my projects page for a closer look at building these projects. You can order boards from the PCBWay shared service, then follow the build guide on my site.
If you’re interested in making your own boards I can highly recommend using the the PCBWay.com service. All of the boards pictured here were manufactured via PCBWay.
Leave a Reply